
Welcome to our First Blog post! L
It was owned by an older couple who purchased it from an older couple who couldn’t use it anymore due to health concerns. The couple we purchased it from had never taken it out or used it either. They also ran into a health crisis. So, this beauty was not used very often and was in much better shape – and within our budget!
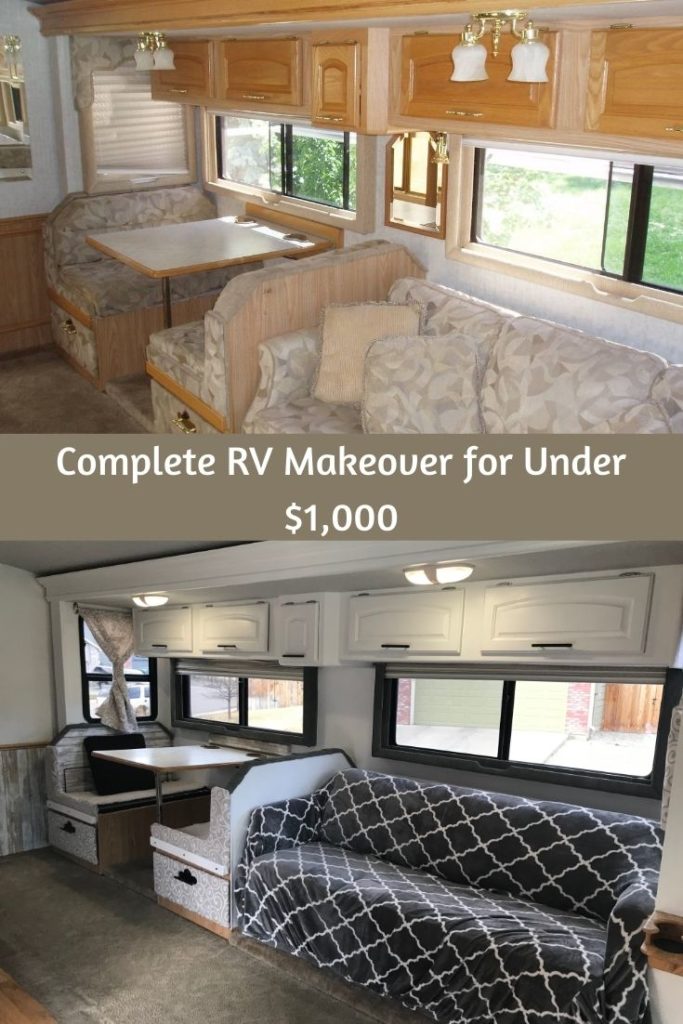
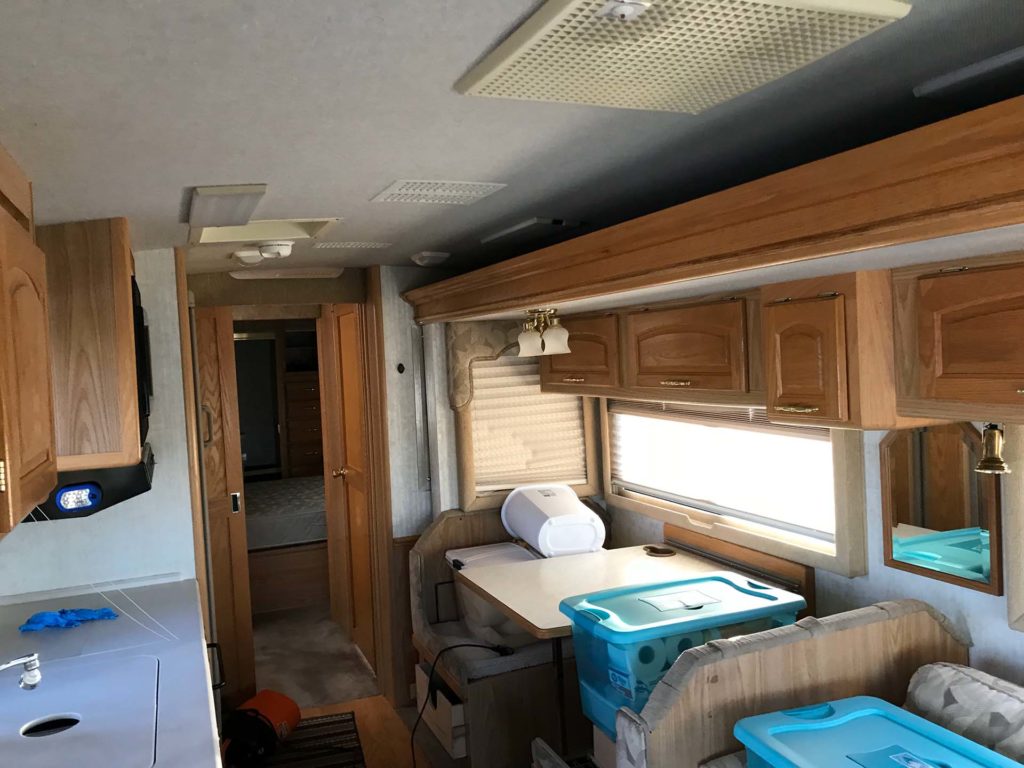
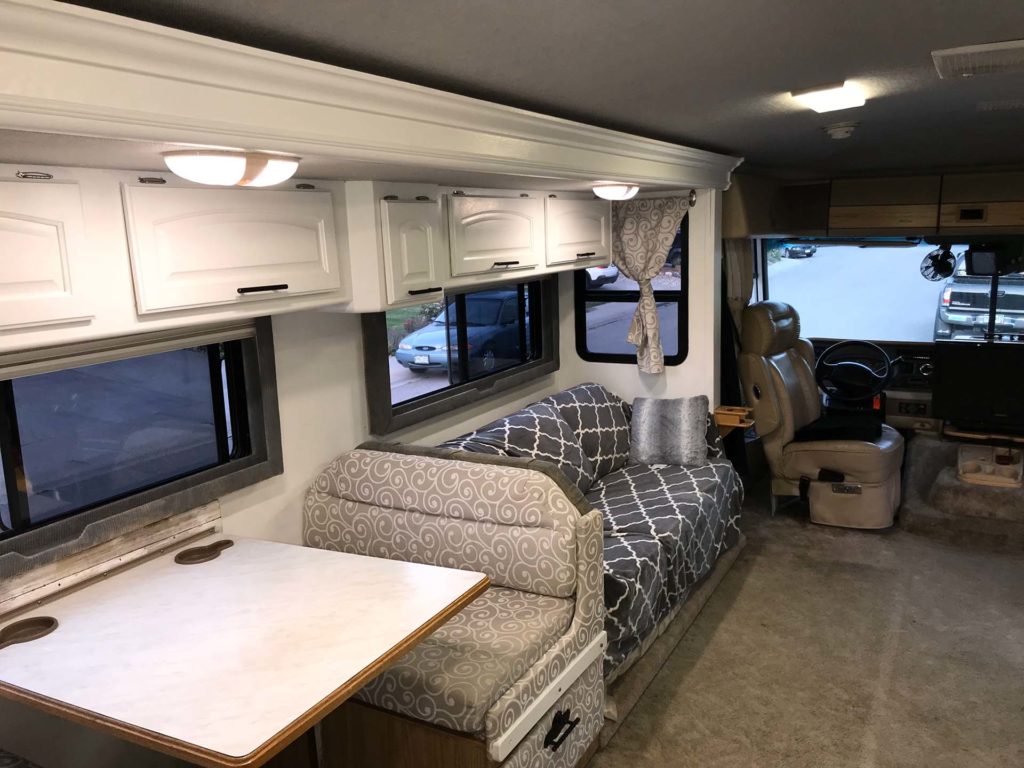
I’m not much for the ’90s/early 2000’s oak and tan look. So while we used our RV “as is” for the first summer out, over this winter I started researching ways we could spruce her up. I join Facebook groups, searched Pinterest, and read blogs. We finally decided that we wanted to paint the cabinets, replace the hardware and remove the valances and replace them with hanging curtains. I also asked a friend who is a sewing ninja if she thought she could recover the dinette cushions.
The months of snow and cold here in Colorado gave me plenty of time to research. After planning out our summer trips, buying fabric, and looking for cabinet hardware, I couldn’t stand letting our RV sit out in storage for another weekend. The first warm weekend, I convinced my hubby that we could start on a few things sooner vs. later. We brought her home and decided that if we plugged into the house, and ran the heater during the night (at night the temps were still in the ’20s-’30s) the paint would dry and cure just fine.
We brought her home and I started removing the valances and mini blinds inside. It was fairly simple and straightforward, with about 8-10 screws holding each one onto the wall. I removed 4 valances and then, well, we went a little crazy with the demo!
Our unit is a 2000 Fleetwood Pace Arrow M34N. There were two different pocket-style sliding doors between the bedroom/bathroom and bathroom/main cabin area. We decided to remove those pocket-style doors and hang a curtain for separation from the bathroom bedroom. We also removed the mirrored and brass closet doors and chose to use a curtain instead (Now our closet does have shelves with a “lip” so items don’t slide off).
We removed the valance and this wall-type mounted unit in the bedroom that had sliding mirrored-type doors/window coverings. We removed several mirrors throughout that were mounted on the walls as well. These mirrors were a major PAIN to remove!
After we were finished with the demo, we filled any holes left from the screws with a wood filler and sanded them down with a sanding block.
After cleaning the cabinets with TSP, we were ready to start painting. Note: if you are considering redoing any type of wood cabinets, cleaning with the TSP is a must! We’ve done this before with our home kitchen cabinets and it helped the paint/stain to really adhere well.
Sale
Savogran 10621 Trisodium Phosphate (TSP) 1LB (16oz)
- HEAVY-DUTY MULTI-PURPOSE CLEANER – Our powdered trisodium phosphate cleaner is a non-sudsing compound that excels in heavy-duty cleaning. Expertly crafted to conquer the toughest jobs, removing stubborn grease, smoke, soot, and chalked paint from almost any type of walls & floors
- USED BY PROFESSIONALS – Trusted by industry professionals, Savogran’s TSP cleaner and degreaser is the definitive choice for high-caliber painting preparation and cleaning tasks. Its effectiveness and reliability makes it a staple in any professional’s (or D.I.Yer’s) toolkit
- PREPARES SURFACE FOR REPAINTING – Transform surfaces into perfect canvases for repainting by using our TSP surface prep. It removes unwanted stains and dirt from nearly any surface, ensuring a clean and smooth base for a fresh coat of paint
$11.66

Buy on Amazon
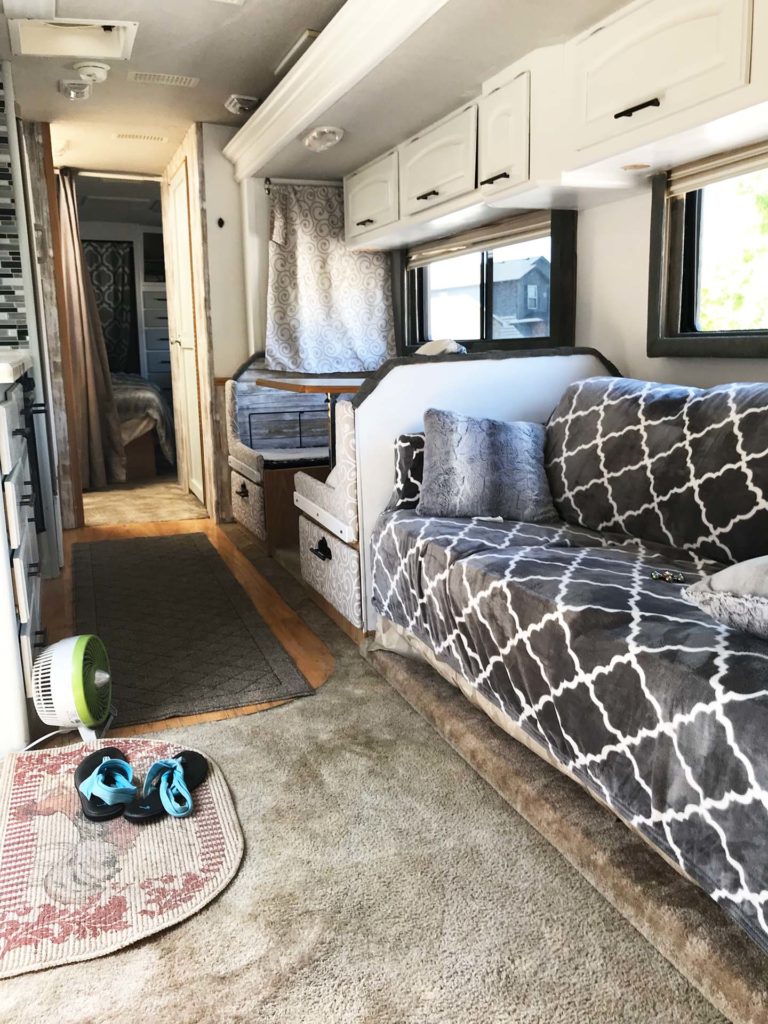
We removed all the cabinet fronts, drawers, etc., and painted. We also painted the cabinets themselves. We used a Valspar cabinet enamel paint from Lowes to paint the cabinets. We did the uppers in white and the lower in gray. In the bedroom, we did the drawer fronts and cabinet doors in gray and the cabinets themselves in white.
Our local home improvement stores did not have the 4-inch handles we needed – so we had to order the hardware. Amazon is usually my go-to but I couldn’t find any handles in the 4-inch that I liked so we ordered these black ones from Houzz.
Then we painted the interior with a Valspar Interior white paint from Lowes (we painted right over the wallpaper). A few things that were super helpful were a smaller roller, a small paintbrush for cutting into those hard-to-reach spaces, and a smaller size paint tray since I was working in tight/smaller spaces than when painting in a full-size house.
We also reused the hinges and spray painted them with Rust-Oleum spray paint. This was about the farthest we got the first weekend.
Weekend #2 – we decided to do even more. After reinstalling all the cabinets and drawers we did a lot of touch up. I used some upholstery fabric from Joanne Fabrics and sewed up some curtains to replace the valances we had removed. I used silver command hooks and some very basic curtain rods to hang the curtains. I also hemmed up the 2 curtains I had purchased – 1 for the bedroom/bathroom separation and one curtain for the closet. They were both too long – so hemming them up was fairly easy.
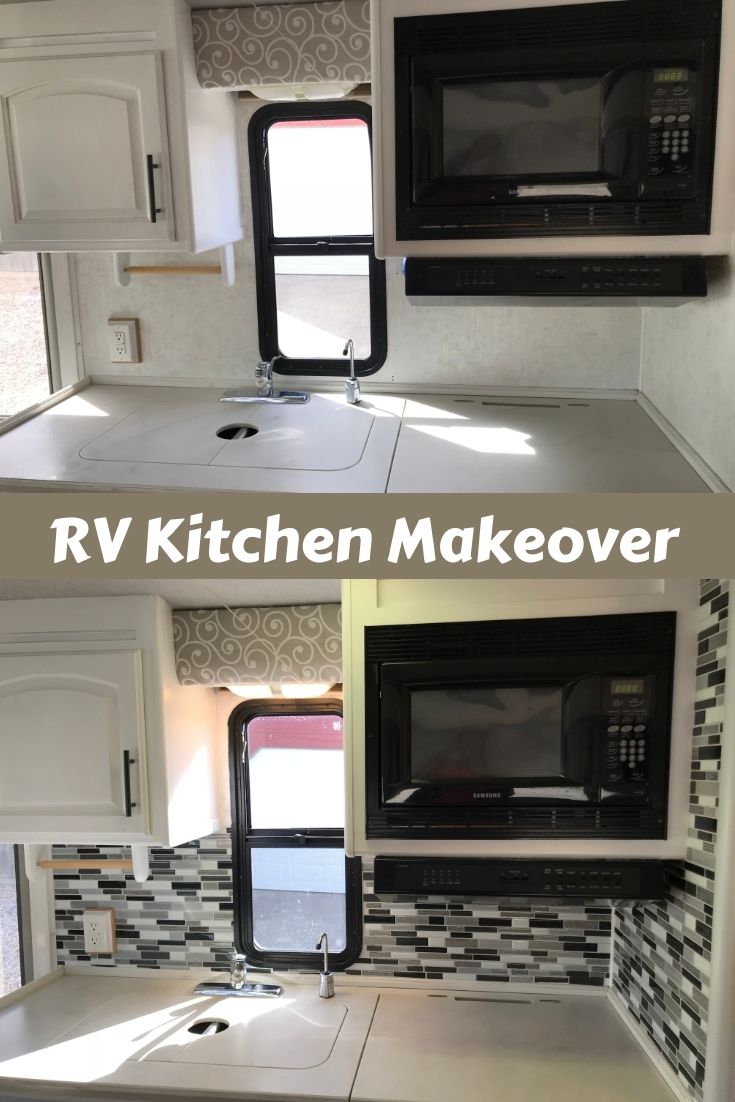
Next up – I did a peel-and-stick backsplash in the kitchen and bathroom. This was super easy – except for some of the smaller areas. It still was not super difficult but let’s just say that all those hours of playing Tetris as a kid paid off during this project! While I was working in the kitchen, my hubby painted several of the chrome bathroom pieces silver. Items like the towel racks and the TP holder. The next area we wanted to work on and the cover-up was the wood paneling. We covered the wood paneling on the dinette area, the hallway walls, and the wall behind the toilet with peel-and-stick wallpaper.
Sale
RoomMates RMK9050WP White Distressed Wood Peel and Stick Wallpaper
- Dimensions – 1 roll – 20.5 inch x 16.5 ft. – 28.19 sq. ft. – 20.5 inch repeat – drop match
- Transform Your Walls – Peel and stick wallpaper is an easy way to revamp any space without any paste or extra adhesive.
- More is More – get more wallpaper per roll with us. RoomMates offers up to twice as much peel and stick wallpaper per roll than other leading competitors.
$33.99
Buy on Amazon
When using our RV last summer, we always were hitting our heads on the light fixtures above the couch and dinette because of how low they hang. We removed these and replaced them with flush-mount LED fixtures. These made such a difference!

Another project was the bathroom. My intention was to remove a large mirror that was wall mounted, paint behind it, and then reinstall it. This did not go according to plan and the mirror broke as we were trying to remove it. I painted the wall and I plan to check with a local glass shop to see if I can find a paper-backed replacement.
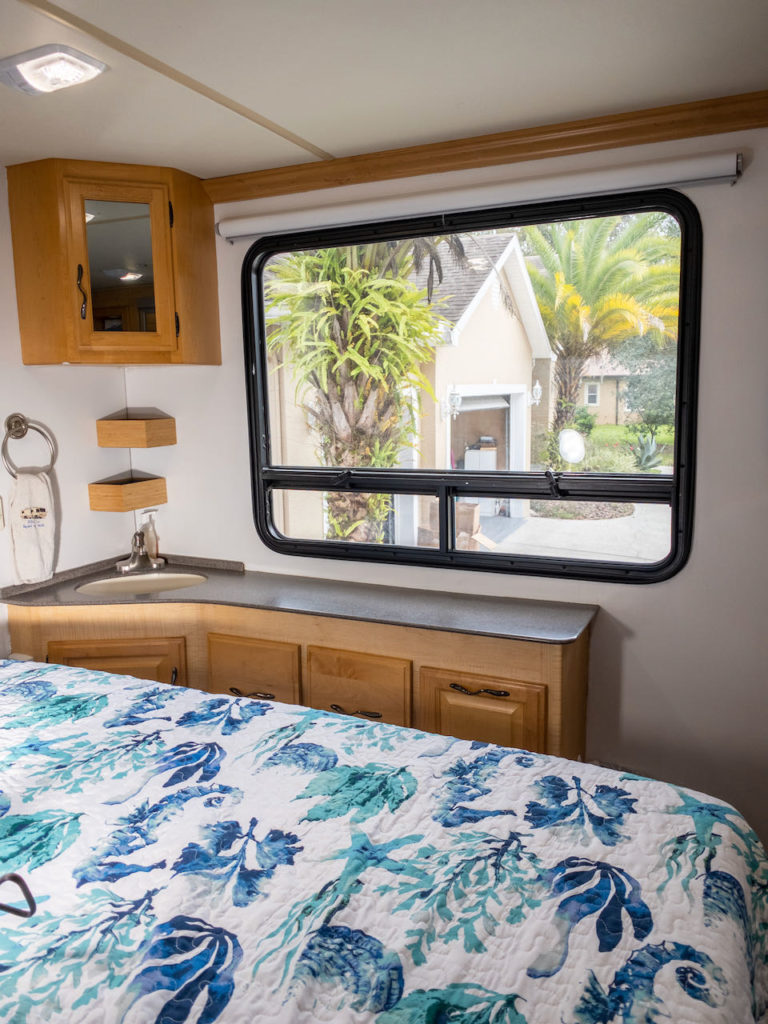
Something else we could not stand was the queen size bed. We sleep in a king-size bed at our home and switching to an RV Queen size bed during our travels made for a difficult sleep. I did some research and found out that the length of a king-size bed would be problematic due to the slide in the bedroom. So. we decided to go with two twin mattresses, a bed tethering system, and a memory foam topper. We removed two side cabinets to make room for the mattress to go wall-to-wall. Next, we purchased some plywood and added it to the existing platform to extend it for the wider mattresses.
After looking at some of the tan fabrics that were still in place – I found some brush-on fabric dye and dyed the top trim on the dinette, the remaining window valances, and the fabric above the bed. I used the fabric creations brush on dye/paint.
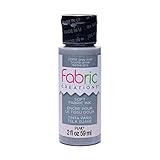
Fabric Creations Fabric Ink in Assorted Colors (2-Ounce), Grey Mist
- Machine washable
- create one of a kind artisan crafted textile projects
- clean while wet with soap and water
$7.55
Buy on Amazon
Since I didn’t want to replace or dye the couch, I found a super soft velvet cover for the couch on Amazon. Since our son sleeps on the couch when we travel, it needed to be a soft cover. This one worked out perfectly.
The final changes were pretty awesome!
Stay Grateful.

Your RV makeover is very impressive. I like how you gave websites of where to buy products. From the pictures, it must be really beautiful and sharp-looking now. Great job!
thanks Conda!
I would love to know where you found the Adventure Awaits hanging.
We found it on Etsy!
Hi there. I have been trying to find the name of the shower head that you switched to for better flow under any water pressure. Could you tell me what it is and where you purchased it? We leave our camper at a campground on KY Lake year around. Just purchased a fifth wheel and want to change the shower head out.
Love your videos and follow along for some of your amazing hacks1
Yes, is the oxygenics shower head and you can find it here: https://amzn.to/3WYf9TZ